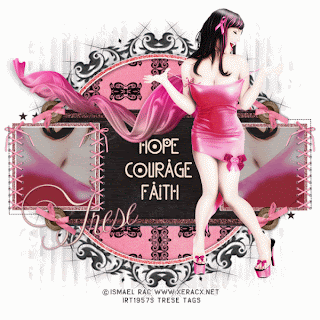
This tutorial was written by me on October 21st, 2010. Any resemblance to any other tutorial is pure coincidence. Please do not claim this tutorial as your own or post to any other blog or website without permission from me. It was written for PSP 9, but should be compatible for any version. And it was written with the assumption that you have a working knowledge of PSP and it's components.
What you will need to accomplish this tutorial: This beautiful scrapkit by the amazingly talented Artmama called Pink Ink that you can purchase HERE at Exquisite Scraps. Thank you Artmama for this wonderful kit. Also from Artmama, you will need her template #20, which you can find on her blog HERE. Once again, thank you Artmama for your generosity. Mask by Essexgirl, Stencilled Circle 1, which you can find HERE along with all of her other masks. You will need to put this mask into your PSP mask folder. The Xero plugin found HERE. This plugin will need to be installed into your plugin folder in PSP. Tube of choice, I used the fantastic art of Ismael Rac. This tube is one of a number of free tubes that can be found on his site HERE. You must still have a license to use this tube which can be requested from his site. Please DO NOT use his tubes without a license. Fonts of choice, I used some of my favorite fonts. One I used for wordart is free called Kingsthings Keltika which you can find HERE. The other is Ekaterina Velikaya which can be downloaded HERE.
Without further ado, let's get started.
Once you have opened PSP, open Artmama's template #20, duplicate (Shift + D) and then close the original. Resize your canvas to 700 by 700 (Image/Canvas Size) Be sure the middle Placement arrow is checked and you are resizing the pixel dimensions. Delete the layers with her copyright and the word art. (NOTE: if you are not using the song lyrics, you can delete the copyright for those.)
You will now open the elements and papers you wish to use in the scrapkit as well as your tube. You will need the standing tube and the large tube. (They come together in the download) You can use my image as a reference for the elements and papers I used.
In your layer palette, select the Circle Glitter Layer and then go to Adjust/Hue & Saturation/Colorize and use these settings: Hue 255 and Saturation 191.
Next in your layer palette, select the Circle bg layer and add a slight drop shadow, about 40% with 1 offset Vertical and Horizontal. You will also do a negative (-1) offset Vertical and Horizontal.
Again in your layer palette select the circle layer. Go to Selections/Select All/Selections/Float/Selections/Defloat. Copy and paste paper of choice INTO the selection. Deselect. (Ctrl + d).
Back to layer palette and select the rectangular glitter layer. Go to Adjust/Hue & Saturation/Colorize and use these settings: Hue 255 Saturation 73.
In your layer palette select rectangular back layer and go to Selections/Select All/Selections/Float/Selections/Defloat. Copy and Paste paper of choice INTO selection. (If your paper choice does not look good pasting into selection, simply paste your paper as a layer and then go back to Selections/Invert and hit delete on your keyboard.)
On each right and left square glitter layers go to Adjust/Hue & Saturation and use these settings: Hue 255 Saturation 191.
On the right square frame layer go to Selections/Select All/Selections/Float/Selections/Defloat. Copy and paste the large tube as a new layer and move it so that the breasts are centered in the selection. Deselect and then duplicate and mirror this layer. You will have to drag this layer above the left square frame in your layer palette. For each of these two new layers go to Effects/Plugins/Xero/Radiance and use these settings: Strangeness 155, Charm 67, Truth 128, and Beauty 222.
Almost done...at this time, go back to layer palette and select the bg layer. Add a new Raster layer and flood fill with black. Now to add the mask...go to Layers/Load/Save mask and apply the sg_stencilled circle 1 mask. Merge group layers.
Add your wordart and name and then copy and paste the tube. Go to Effects/Plugins/Xero and apply the same settings as before.
Add your copyright information, resize to fit your needs and we're done. I hope you enjoyed my tutorial and hopefully learned something from it. I enjoy seeing your results, please contact me at tresetags@gmail and send me your results as well as any questions or concerns.
Thank You.


No comments:
Post a Comment