

Listen as the wind blows from across the great divide
Voices trapped in yearning, memories trapped in time
The night is my companion and solitude my guide
Would I spend forever here and not be satisfied?
Possession by Sarah McLachlan
This tutorial was written by me on March 6th, 2013. Any resemblance to any other tutorial or tag is unintentional and is pure coincidence. Please do not claim my work as your own and do not post to any other website, blog or forum without permission from me. It is written with the assumption that you have a working knowledge of PSP and its components. It was written for PSP 9.
I recommend that you read through this or any tutorial you are attempting before starting it so you will know what to expect and how to get organized.
As with any of my tutorials when a plugin is required, change only the settings I recommend and leave the others on the default settings.
What you will need to accomplish this tutorial is the stunning art of the amazing Gaetano Di Falco Illustrator which you can purchase at Creative Design Outlet HERE. Please support the arts and do not use Gaetano's tubes without a license and certainly do not share. There is no scrap, just a few elements I've collected and a few brushes which you can download in the supplies I've included HERE. Plugins are Alien Skin Eye Candy 5/Impact, Eye Candy 4000 and Penta. Fonts are Cocaine Sans which you can download HERE and Cymbeline which can be downloaded HERE.
Let's get started, but first let's get your brushes installed. Open each brush into PSP then go to File/Export/Custom Brush...name it and save.
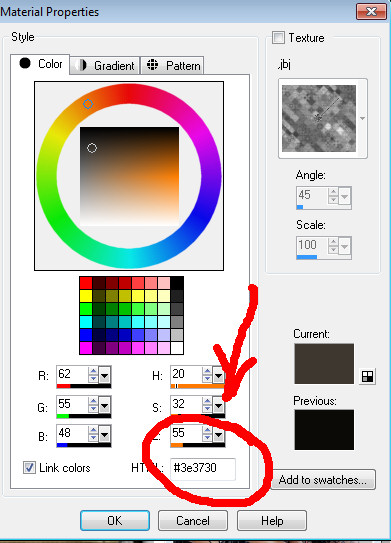
Now start a new 700 x 500 transparent image. Now start a new image which is 550 x 225 and the color of it is this #3e3730...put this number in the space as seen in the example below....
Now copy and paste this into the first canvas you created.
Grab the Magic wand tool with no feather and select what you just posted then begin to use the supplied paint brushes to decorate the background. You can use my image as a reference.
Now go to Selections/Invert and begin to copy and paste your tube and the supplied elements to decorate the foreground. When you have one in place simply hit delete to get rid of anything outside the square frame you're working with. And on each element and your tube go to Effects/Artistic Effects/Aged Newspaper and set the Amount to age to 10.
Once everything is in place grab your Preset Tool set on Rectangle with a Solid line style and Width of 3 and draw a small frame outside your work. Then go to Effects/Plugins/Alien Skin Eye Candy 5/Impact/Chrome and use these settings:

Add a slight drop shadow...
Next, above your background layer draw a black rectangle with your Preset Tool slightly larger than your original rectangle...see my image...convert to Raster layer and take the Opacity down to 50. Then go to Effects/Plugins/Penta/Jeans and use these settings:
Next, above your background layer draw a black rectangle with your Preset Tool slightly larger than your original rectangle...see my image...convert to Raster layer and take the Opacity down to 50. Then go to Effects/Plugins/Penta/Jeans and use these settings:

Now draw a rectangular frame outside this rectangle...set the width to 8 and then go to Effects/3D Effects/Inner Bevel and use these settings:

Don't forget to add a drop shadow...
Now add your wordart...to make it appear to be fading use your Selection tool set on rectangle with about a 70% feather and select small areas and hit delete, then set your opacity to about 85%.
Add your name and copyright...taking care that your copyright is legal and legible and you're done.
Thank you for trying my tutorial. I hope you had fun with it and maybe learned something to hone your PSP skills. Please don't hesitate to contact me for questions or concerns with any of my tutorials.
Blessing,
Trese
1 comment:
Love the tut-will give this a go-thanks for sharing :)
Evita
Post a Comment