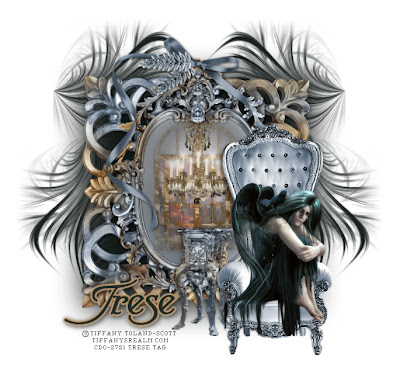
This tutorial was written by me on February 27, 2012. Any resemblance to any other tutorial or tag is pure coincidence. Please do not claim my work as your own and certainly DO NOT post my tutorials on any website, blog or forum without permission from me. My email is tresetags@gmail.com or you can find me on facebook through my link on this blog. I wrote this tutorial with the assumption that you have a working knowledge of PSP and its components. It was written in PSP 9, but should be compatible with most versions.
What you will need to accomplish this tutorial is listed below:
This beautiful kit by Hungry Hill, French White. You can purchase it HERE at Creative Design Outlet. Thank you Alison for you talents.
Tube by the amazing Tiffany Toland-Scott. You can purchase all of her tubes HERE also at Creative Design Outlet. Please support the arts and do not use her tubes without a license to do so.
Brush...which I have supplied HERE. It's a .png image and will have to be put into your PSP brush file. Open the .png image into PSP...go up to File/Export/Custom Brush and save it there.
Font is Turbayne Running and can be downloaded HERE.
For the scene in the window I used a mist I got from a Yahoo group years ago. Anything with the same colors would do. Be sure it's not copyright protected.
A small sparkle or a sparkle brush.
Eye Candy 4000
It's always a good idea to read completely through any tutorial you're going to attempt so you know what to expect and how to organize.
For any tool or plugin I use in my tutorials change only what I teach you to change, the rest leave on default.
Let's begin.
Start by opening a 750 x 750 new white image. We'll resize later. Open your tube and elements. You can use my image as a reference for what I used. Copy and paste the large square decorative frame into your working image. Add a slight drop shadow. Duplicate it. On the duplicated frame go up to Adjust/Hue & Saturation/Colorize and use these settings: Hue 149 and Saturation 38. Now go to your tools and get your selection tool, set it on ellipse and change your feather to 88. Going around the edges and different areas of the frame select small parts and then hit delete only once. For areas where you want more of the color underneath, hit delete again. Go up to selections/select none.
Next copy and paste the mirror on top of that frame you just worked with. Add a slight drop shadow and duplicate it. Do the same as you did for the square frame to expose the colors underneath...only in the middle select about 40% of the inside of the mirror and hit delete a couple of times. Copy and paste the window frame underneath the top mirror layer. Resize it to fit inside the mirror using your raster deform tool. Add slight drop shadow. Copy and paste your 'outside' scene underneath the mirror layer and use your eraser tool to delete any of the mist or tube which is outside the window frame.
Now you will copy and paste your chandelier over your window frame layer. Use your raster deform tool to resize it. Do not add a drop shadow. Using your small sparkle brush or your small sparkle tube place either on each part of the lights where they are the brightest.
Next copy and paste the rest of your elements and your tube. You will notice that for the table beside the chair, I done the same as I done on the frame and the mirror. Colorize your chair as you did before with Hue and Saturation using the same settings. Don't forget your drop shadows.
When placing a tube to sit in a chair or on anything, pay special attention of the size of each making sure they are relevant to one another. If the tube has a hand which appears to be resting on something...its hand should rest on the object it is sitting on or it will appear to be floating...you have to ground your tube to its surroundings.
Next, go to the very bottom of your layer palette and select your backgroung layer and then add a new raster layer. Flood fill this layer with a dark color from your tube or elements. Using your selection tool with the same settings as before with feather at 88 select around the very edge of the square decorative frames. Go up to Selections/Invert and hit delete.
Now add a new raster layer over this layer and using my image for reference use your brush on one side...duplicate this brush layer and mirror it. Then duplicate it again and rotate 90 degrees, place this layer at the bottom of the frame and duplicate/mirror again.
Add your name, then go to Effects/Plugins/Eye Candy 4000/Gradient Glow and use these settings:
Basic Tab
Glow Width....4.51
Soft Corners.....25
Overall Opacity.....100
check draw only outside selection
Color Tab
Select Black Halo
change your colors to a gold color from your image
Opacity.........100
Add your copyright making sure it's legible, resize and you're done.
Thank you for trying my tutorial. I hope you enjoyed it and maybe, hopefully learned something. I appreciate any feedback and really need to know if I have broken links. Like any tut writer, I love to see results from my tuts...please feel free to contact me with your results.
Love and Blessings,
Trese

No comments:
Post a Comment