Listen as the wind blows
From across the great divide
Voices trapped in yearning
Memories trapped in time
The night is my companion
And solitude my guide
Would I spend forever here
And not be satisfied
From across the great divide
Voices trapped in yearning
Memories trapped in time
The night is my companion
And solitude my guide
Would I spend forever here
And not be satisfied
This tutorial was written by me on April 29th, 2012. Any resemblance to any other tutorial or tag is unintentional and is pure coincidence. Please do not claim my work as your own and do not post to any other website, blog or forum without permission from me. It is written with the assumption that you have a working knowledge of PSP and its components. I wrote it for PSP 9, but it should be compatible with most versions.
I recommend that you read through this or any tutorial you are attempting before starting it so you will know what to expect and how to get organized.
As with any of my tutorials when a plugin is required, change only the settings I recommend and leave the others on the default settings.
What you will need to accomplish this tutorial is the fabulous art of Camilla Drakenborg. You can purchase her tubes over at UpYourArt HERE. Please support the arts and DO NOT use her art without a license. This beautiful scrap by Gothic Inspirations which you can purchase at her store HERE. Thanks Jess, love this kit. One of my masks you can find right here on this blog...it's Trese Mask0001 and can be found HERE for download. Plugins Alien Skin Eye Candy 5/Impact and Eye Candy 4000. Font is Texas Hero and can be found HERE.
Let's get this started...
First, of course, you will need to put your mask into your PSP mask folder. Open all of your elements and tube into PSP. Start a new 700 x 700 white image. Copy and paste the clock image into this new image which from this point I will refer to as 'your working image.' Copy and Paste your paper behind this layer. I used Paper 5. Resize both by 25%. Delete the areas outside the round part of the clock with your eraser tool. Then with your Raster Deform tool warp the clock to appear as though it's laying down. Do the paper the same way and it will fit beneath the clock perfectly...if you do have areas not under the clock, simply erase them.
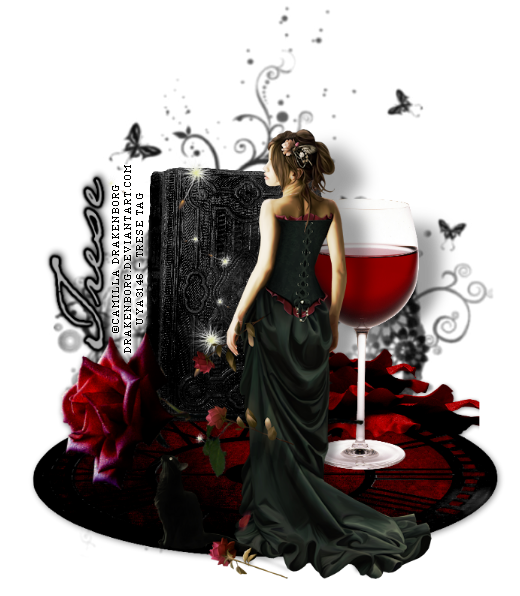
Now, using my image as a reference, copy and paste all of your elements into your working image. You can use your Raster Deform tool to resize your elements and tube. You will find that resizing with this tool will not distort or pixelate them depending how large or how small you go. On your tube and wine glass go to Effects/Plugins/Eye Candy 5/Impact/Perspective Shadow. This is a plugin that requires practice, but essentially it's not difficult. It may appear overwhelming the first time you use it, but there are really only two main things you need to know about this plugin: Nodes and the red box. With the nodes you can manipulate your shadow any way you want and the red box allows you to view all areas of whatever you're shadowing.
In the settings tab you will find multiple sorts of shadows or reflections, any of which can be manipulated moving your nodes around. You can move one node at a time by holding down your Ctrl key while moving the node with your mouse. With the red box if the entire tube isn't in the display window you can drag the red box to view any area not displayed. It's very important to make your shadows look natural. This is why you need to pay special attention to all areas of whatever you're shadowing and being sure your shadow isn't too dark or too light and that your shadow falls naturally. Simply think about how a shadow would look and manipulate your nodes until this happens. For a darker design, your shadow should appear darker and vice versa for a lighter design.
Next, above your background layer add a new raster layer and flood fill with black, resize by 90% and apply your mask Trese Mask0001.
Add your copyright taking care that it is legal and legible. For a professional looking copyright credits I use pixel for copy fonts, you can Google and find them all over the net. These fonts work best at size 6 with your antialias off. For the copyright symbol hold down your ALT key and hit 0169.
Add your name and go to Effects/Plugins/Eye Candy 4000/Gradient Glow. In the color tab use Black Halo and drag the opacity all the way to 100%...color is black. In the Basic Tab Glow Width 3, Soft Corners 25 and Opacity 100%...color is black. Then go up to Image/Rotate/Free Rotate and rotate 90 degrees to the Left.
And we are done.
Thank you for trying my tutorial. I hope you gleaned something from it to hone your PSP skills. Please don't hesitate to contact me if you have questions or if there are broken links. Happy creating...
Blessings, Trese


No comments:
Post a Comment