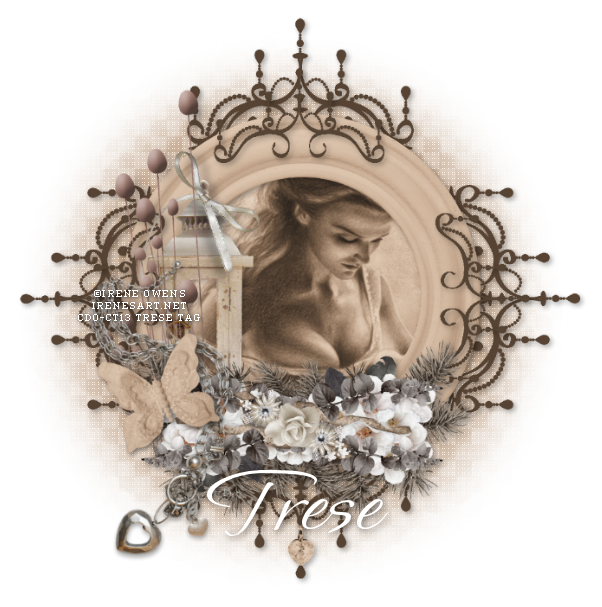
This tutorial was written by me on April 12th, 2012. Any resemblance to any other tutorial or tag is unintentional and is pure coincidence. Please do not claim my work as your own and do not post to any other website, blog or forum without permission from me. It is written with the assumption that you have a working knowledge of PSP and its components. I wrote it for PSP 9, but it should be compatible with most versions.
I recommend that you read through this or any tutorial you are attempting before starting it so you will know what to expect and how to get organized.
As with any of my tutorials when a plugin is required, change only the settings I recommend and leave the others on the default settings.
What you will need to accomplish this tutorial is this very beautiful scrap kit by Paprika and Doudou's Designs called You and I over at Digital Crea HERE. This kit is loaded with beautiful elements of superior quality. The stunning art of Irene Owens that can be purchased at Creative Design Outlet HERE. Please support the arts and do not use Irene's art without a license. Mask by Weescotclass WSL_Mask 208 that can be found HERE along with all her other amazing masks. Plugin Penta. Font is pay font by Rob Leuschke called Ephesis. You can buy his fonts HERE, he truly has some gorgeous fonts.
Let's get started...
First of all, put your mask into your PSP mask folder. Then open all of your elements and your tube into PSP. You can use my image as a reference for what elements I used. Keep in mind we will do some colorizing.
Start a new 700 x 700 white image...we will resize later. Copy and paste the frame into your new image which from this point we will call your 'working' image. Using your raster deform tool resize to a good size that fits centrally into your working image. Go to Effects/Artistic Effects/Sepia Toning and set your Amount to Age to 65. We will use this same setting for everything else that we use this effect on.
Now copy and paste your tube beneath this frame layer. To resize your tube to fit nicely into your frame, use your Raster Deform tool. Add the sepia effect to your tube. Copy and paste your paper...I used paper 6...beneath your tube layer. Resize to 25% and add the sepia effect. Using your eraser tool, erase all the paper which is outside the frame.
Beneath your paper layer add a Raster layer and flood fill with the darkest sepia color from your frame. Add your mask, WSL_Mask 208. If you need to resize to fit nicely beneath your frame, use your Raster Deform tool. You will find this tool is great for getting precise sizing and it pretty much eliminates distortion of what you are resizing depending on how big or small you go. Go to Effects/Plugins/Penta/Dot & Cross and use these settings: Amount is 72, cross distance 10 and cross width 2.
Copy and paste the part 1 (2) element above your mask layer, resize 25% and then use your Raster Deform tool to get your precise sizing. Add the same sepia effect and a slight drop shadow using these settings: Offsets Horizontal and Vertical to 4, Opacity 43, Blur 14. Color is black.
Now above your frame and to the bottom, copy and paste the element part 1 (4), resize 25% and then use your Raster Deform tool for precise sizing. Add the same sepia effect and same drop shadow as above. Then copy and paste the element part 1 (5), resize in the same manner as you just did but do not add your drop shadow yet. Go to Image/Flip and place this element to the top of your frame. Duplicate this element and go to Image/Rotate/Free Rotate and rotate 90 degrees either left or right and place to the left or right of your frame. Duplicate and Mirror and place on the other side of your frame carefully lining up each side. Add your drop shadows to each of these three elements.
Copy and paste the rest of your elements, resizing as we have and using the same drop shadow. You will add the same sepia effect to your butterfly.
Now, hide your background layer and merge all the visible layers. Unhide your background layer and you can use your Raster Deform tool again to resize your work. I've found resizing this way will not distort my work. Crop your image (crop tool) to your desired size.
Add your copyright, taking care to be sure it's legal and legible. For the perfect copyright font, google pixel or copy fonts, there's a lot of them out there. If you will use size 6, most of these fonts won't pixelate. Some you can use size 8. Be sure your antialias is off using these fonts. It will make them crisp.
Add your name. Antialias should be on sharp for most fonts. I added the same drop shadow to my name. And we are done.
I hope you enjoyed my tutorial and learned something to help hone your PSP skills. Please let me know if you have questions or if there are broken links. I would love to see any results you have from any of my tutorials...thank you for trying my tutorial.
Blessings, Trese

No comments:
Post a Comment