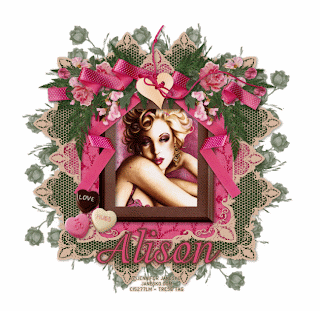
SOMBER VALENTINE

This tutorial was written by me on January 20, 2012. Any resemblance to any other tutorial is pure coincidence. Please do not claim my work as your own and certainly do not post my work on any other website, blog, forum, etc without permission from me. You can email me at tresetags@gmail.com or find me on Facebook. I wrote this with the assumption that you have a working knowledge of PSP and it's components. I personally use PSP 9, but this should be compatible with most versions.
What you will need to accomplish this tutorial is this fabulous kit by Hungry Hill named I Do Love Hugs which you can find at Creative Design Outlet (CDO) Store HERE. Thank you Alison for your amazing work. You will also need this mask by Weescotslass Creations, WSL_Mask226, found along with all her other beautiful masks HERE. Eye Candy 4000. Tube of choice, I used the stunning artwork of Jennifer Janesko which can also be found at Creative Design Outlet HERE. Please help prevent piracy and do not use Jennifer's or any other artist's tubes without a license for them. And font of choice, I used a free font called Adorable, you can download it HERE.
If you're ready, we'll get started.
Open a 750 x 750 new image in PSP...you can resize later. Next, open your elements in PSP. Copy and paste the lace-edging into your new image. Use your Raster-Deform tool to resize to about 80% of the canvas size. Or simply resize by 80%. I have found that if I use my Raster-Deform tool it tends to not distort my tubes whereas most of the time just resizing will.
Now you are going to copy & paste paper 3 below the lace-edging layer. Resize to 75%. Now select your eraser tool and set the size to 35%, leave the rest of the settings to default settings and you should use the round eraser. Using my image as a reference, erase the paper from the outside the the middle part of the lace-edging.
Okay, now beneath the paper 3 layer, add a layer and flood fill it with #293a1f, it's the dark green in the flower arrangements leaves. Resize this layer to 85% and as you done previously with paper 3, erase the outer edges of this layer from the lace-edging's outer edges.
Next you will add a layer beneath the dark green layer and flood fill with the same dark green #293a1f, resize to 90% and apply mask WSL_Mask226.
Now on top of the lace-edging layer, which should be your top layer, copy and paste the frame 1. Use your Raster-Deform tool to resize this frame to fit inside the inner frame of the lace-edging. Copy and paste your tube beneath the frame and resize to fit.
Using my image as a reference copy and paste the rest of your elements and arrange on your canvas. Don't forget to give each element a slight drop shadow for depth. For the ribbon in my arrangement I simply put a ribbon beneath the flowers and one on top of them and used my eraser to remove parts of the ribbon to look like it intertwines through the flowers.
For your name, pick a pink color from within the flower arrangements. Make it a Raster layer, then go to Effects, Eye Candy 4000/Gradient Glow and use these settings: Basic Tab...Glow Width 3.0, Soft Corners 100, Overall Opacity 100. Color Tab select Black Halo, set both colors to brown and Opacity at 100. Then go back up to Effects/Eye Candy 4000/Corona and use these settings: Glow Width 5.0, Flare size 14, Stretch 100, Waver 23, Blur 0, Overall Opacity 100, Color same brown as used with Gradient Glow and check Draw Outside Selection. Add a brown drop shadow at about 60% with a 12% Blur.
Add your copyright being sure it's legible. Resize your image to fit your needs and you're done.
I hope you enjoyed my tutorial and learned something from it. I appreciate any feedback and welcome questions. Please let me know of any broken links.
Thanks, Trese

No comments:
Post a Comment