
This tutorial was written by me on April 12th, 2012. Any resemblance to any other tutorial or tag is unintentional and is pure coincidence. Please do not claim my work as your own and do not post to any other website, blog or forum without permission from me. It is written with the assumption that you have a working knowledge of PSP and its components. I wrote it for PSP 9, but it should be compatible with most versions.
I recommend that you read through this or any tutorial you are attempting before starting it so you will know what to expect and how to get organized.
As with any of my tutorials when a plugin is required, change only the settings I recommend and leave the others on the default settings.
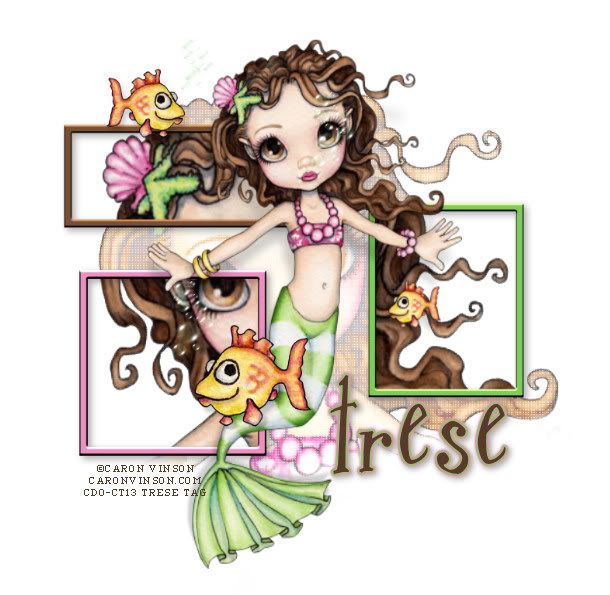
What you will need to accomplish this tutorial is this precious tube by Caron Vinson which you can purchase at Creative Design Outlet HERE. Please support the arts and do not use Caron's tubes without a license. You will need the plugins Xero, Penta, Alien Skin EC 5 and Eye Candy 4000. There is no scrap. Font is Ahoy Sea Shanty you can download HERE. There is no scrap.
Let's get started...
Start a 700 x 700 new white image. We will resize at the end. Open your tube into PSP and copy and paste the close up tube into your new image which will now be your working image from here. Using your Raster Deform tool resize close to twice it's original size. Use your selection tool with a feather of 94% and select the lower edges of this tube layer and hit delete.
Now you will duplicate this tube layer. On the layer you duplicated go to Effects/Plugins/Xero/Radiance and use these settings: Strangeness 115, Charm 85, Truth 131 and Beauty 70 and apply. Hide this layer and select the original tube layer and go to Effects/Plugins/Xero/Illustrator and use these settings: Abstraction 61, Coloration 231, Definition 49 and apply. Now go back to Effects/Plugins/Penta/Dot & Cross and use these settings: Amount 145, Cross Distance 10, Cross Width 2 and apply. Unhide your duplicated layer.
Next above your duplicated tube layer draw three rectangles of various sizes and colors which match your tube. Change each to a raster layer. You will put an inner bevel on each by going to Effects/3D Effects/Inner Bevel and use these settings: Bevel 2, Width 2, Smoothness 2, Depth 45, Ambience 44, Shininess 0, Angle 354, Intensity 38, Elevation 30, color is white. Add a light drop shadow.
Now go to your layer pallet and select your duplicated layer. Using your eraser tool erase the parts of this tube layer outside your rectangle frames to allow your original layer to show through. Cool hunh?
Next copy and paste your full size mermaid tube and place it centrally into your working image. Use your raster deform tool to resize if needed. Now we're going to use a plugin that really takes practice and attention to each part of what you're shadowing. Go to Effects/Plugins/Alien Skin Eye Candy 5/Perspective Shadow. It's a good thing for the Undo because when I first started using this plugin I undone so many times it's amazing I didn't break it. For our purpose here use the factory settings and move the nodes around to get your desired effect. You can move one node at a time by holding down the Ctrl key. There is also a red box at the top of the window of this plugin that you can move around to view each area of what you're shadowing. Just be sure your shadow looks natural. Think about where the shadows should fall and where there should be no shadow at all showing. For a lighter pallet your shadow should have a lower opacity as we do here.
Copy and paste your fish and add a Perspective Shadow to them as well. You want to make them appear to be floating as you do your mermaid as well.
Now add your name, antialias set on sharp and go to Effects/Plugins/Eye Candy 4000 and use these settings: Color Tab pick Black Halo. Your first color swatch should be one color from your tube and second swatch a different color from your tube. In your Basic Tab...Glow Width 3, Soft Corners 100, Overall Opacity 100, check draw only outside selection. Apply and then add a light drop shadow.
Add your copyright taking care that it's legible and legal. For my copyright I use pixel or copy fonts. You can google them and find all sorts. These fonts work best at size 6 or 8 and if you set your antialias to off they won't pixelate.
Thank you for trying my tutorial. I hope you enjoyed it and learned something useful to hone your PSP skills. Please feel free to contact me with questions for issues with broken links.
Blessings, Trese
No comments:
Post a Comment