
"Don't be afraid if things seem difficult in the beginning, that's only the initial impression. The important thing is not to retreat, you have to master yourself."
Olga Korbut
This tutorial was written by me on November 14th, 2012. Any resemblance to any other tutorial or tag is unintentional and is pure coincidence. Please do not claim my work as your own and do not post to any other website, blog or forum without permission from me. It is written with the assumption that you have a working knowledge of PSP and its components. It was written for PSP 9.
I recommend that you read through this or any tutorial you are attempting before starting it so you will know what to expect and how to get organized.
As with any of my tutorials when a plugin is required, change only the settings I recommend and leave the others on the default settings.
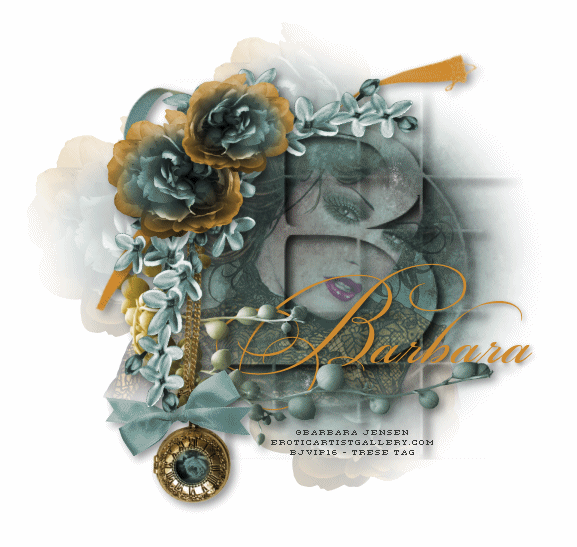
What you will need to accomplish this tutorial is the amazing and incomparable art of Barbara Jensen which you can purchase from her on her site HERE. This stunning kit by the wonderfully creative Crazy Carita which you can also get on Barb's site, it's called Old News. Please support the arts and do not use Barb's tubes without a license and DO NOT share her tubes or this kit. You will need the animation from Lovey, you can find it on her site HERE or you can grab the download I provided HERE, it's called Tiny Glitter. I recommend you visit her site and grab all the wonderful anis she has available free to use. There are no plugins required, we're going to utilize some of PSP's capabilities. There is no mask, we're going to make the background. The fonts are called Gra fCirculum Bricks and can be downloaded HERE and Bickham Fancy Script Fancy HERE.
Let's get started...
Start a new 700 x 700 white image, we'll resize later. Type your first initial at size 400 with the Graf Circulum Brick font. Create as Floating with Antialias set to Sharp. Now go to Selections and follow these steps:

Name it your initial and hit Save, then hit delete and go back to Selections Load/Save Selection/Load Selection From Alpha Channel...
Add a new Raster Layer, then go to Effects/3D Effects/Cutout and use these settings:

Go to Selections/Select None. Grab your Selection Tool with a feather of 35%, set on Rectangle and select the outer edges of the initial. Go to Selections/Invert and hit delete to soften the outer edges and get rid of the darker harder edges. You will most likely have to hit delete several times to get the desired effect:

Selections/Select None, give it a fairly dark drop shadow. Then copy and paste paper 8 below your initial, resize 75% and grab your Selection tool again with the same feather only set it on Circle. Select the inner portions of the paper in the initial with a bit outside it. Selections/Invert and hit delete. To move your selection you can hold down the right mouse button and click inside it and move it if you need to center your circle. Do not deselect. Copy and paste the close up tube into your circle, place it so her face fits nicely in the circle and hit delete, then deselect. Take the opacity of your tube layer down to 45%.
Using my image as a reference copy and paste the elements from the kit into your canvas. You can use your Raster Deform tool for precise sizing, rotating, etc. Don't forget to add drop shadows. Merge the element layers together to keep a clean palette once you have them like you want them.
Add your name above your initial with the Bickham Script Fancy in the gold color from the elements and don't forget to give it a slight drop shadow.
Above your background copy and paste the flower element, duplicate it and make it varying sizes. Take the opacity down to about 28%, then with your Selection tool with about a 75% feather, select small areas of the flowers and hit delete to soften them.
Add your copyright taking care that it is legal and legible. For a neat and professional-looking copyright I use a pixel font, you can Google and find literally hundreds of these fonts. Most work best at size 6 with your Antialias off.
At this point merge down from the tube to the background, hide the layers above it, then copy this layer. Open Animation Shop (AS) by going to File/Jasc Software Products/Launch Animation Shop and paste what you just copied into it. Open the Lovey animation and take note that it has 18 frames once you delete the copyright frame. Therefore our animation must have 18 frames as well. So click on the top of what you just pasted and go down to Duplicate Selected. Repeat this enough times to get 18 frames. If you make too many frames, simply select the extras and hit delete.
Now go back to PSP. Hide the bottom merged layers and unhide the top hidden layers. Hold down CTRL + SHIFT and hit C to copy merged and go back to AS. Hold down CTRL and hit v to paste a new animation. Duplicate it so you have 18 frames as you will drag this into your working animation. Again, be sure you have all frames selected in both and that you are on the first frame of both by making sure your slider bar at the bottom is all the way to the left. Carefully drag the new ani into the working ani, do not let go until you have it placed where you want it.
Check your work, View/Animation...if you're happy with it, resize to fit your needs or preferences, save as a .gif and you're done.
Thank you for trying my tutorial, I hope you enjoyed it and maybe even learned something to hone your PSP skills. Please do not hesitate to contact me with any questions or concerns about any of my tutorials.
Blessings,
Trese
No comments:
Post a Comment