

African Queen
This tutorial was written by me on September 12th, 2012. Any resemblance to any other tutorial or tag is unintentional and is pure coincidence. Please do not claim my work as your own and do not post to any other website, blog or forum without permission from me. It is written with the assumption that you have a working knowledge of PSP and its components. It was written for PSP 9.
I recommend that you read through this or any tutorial you are attempting before starting it so you will know what to expect and how to get organized.
As with any of my tutorials when a plugin is required, change only the settings I recommend and leave the others on the default settings.
What you will need to accomplish this tutorial is this captivating tube by Anna Liwanag and the magnificent kit to go with it by the amazing Crazy Carita. You can purchase this as a tube-bundle pack from Creative Design Outlet HERE. There are two more stunning tubes in this bundle pack every bit as lovely as this one. You will need the brush I supplied HERE. Plugins are Alien Skin Eye Candy 5/Impact, Xero, Toadies, and Eye Candy 4000. The font is Afrika T Ubuntu you can download from HERE. The ceriph font for copyright is Ceriph 07_56 you can grab HERE.
Let's do this...
First we need to get your brush into PSP for use. It's just a coupe easy steps. Open the files I provided into PSP. It's in .png format, you can also use .jpegs. Go to File/Export/Custom Brush. Name your brushes and click Ok and now it's installed in PSP ready for use.
Now start a 700 x 700 new white image, we'll resize later. Copy and paste frame 5 into your new canvas, resize it 75% and move it slightly to the left. Copy and paste paper 4 beneath this frame layer. Resize it 65%, center it under your frame then grab your Selection tool set on Ellipse with a 10% feather and select the part of the paper inside and slightly into the middle edge of the frame. If you need to center your selection, select you Move tool and right click into the selection, hold your right mouse button down and move it until it's centered. Go to Selections/Invert and hit delete.
Next, copy and paste your tube above this paper, resize it 95% and place it to left of your frame..see my image. Once you have it in place, duplicate it and drag the duplicate over the top of the frame in your layer palette. Use your eraser tool to carefully erase the lower edges of the tube so she fits into the frame.

Erase carefully around the lions mane/fur so not to erase any of it. Then go down to the original tube layer and erase the part of the tube sticking out from the frame. Add a fairly dark drop shadow to your frame since the palette is on the darker side...

If you wish, you can use my image as a reference for size and placement of the other elements. I use my Raster Deform tool (or Pick tool in newer versions) for precise sizing. It also eliminates the pixelation and distortion that takes place when resizing in percentages at times depending how large or how small you go. You can also rotate the elements 360 degrees if you want. If you don't already use this tool, let me introduce you to my leetle best friend....I use it all the time and love it. The thing to remember, I think, about using foliage is that nature does not grow symmetrically...it's wild and unpredictable and random. Don't place your foliage symmetrically. Also, in most cases, an odd number of elements...like 3 of the same flower, 5 of a star, etc., makes a composition more interesting. I learned this in design 101. Don't forget to add your drop shadows...you should most of the time use the same drop shadow you started with. And if you have a dark palette, your drop shadow should be dark and vice versa for a lighter palette. I will post below, the beginning of pasting your elements so you can see what's beneath the surface in my design.


This design starts with el8 pasted below your paper layer, then el7 on top of the frame, el20 and then el11...four elements. Now build your flowers and your tassles from there. Remember you can tweak your elements with your Raster Deform tool.
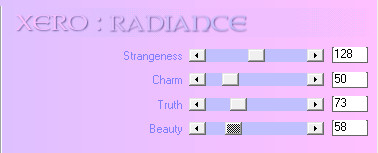
Once you have your basic design set up, hide your background layer and Merge/Visible layers together and go to Effects/Plugins/Xero/Radiance and use these settings:
Now duplicate your work and go back to the original layer, resize it 105% and go to Effects/Plugins/Toadies/Blast 'em and use these settings:
Then go to Effects/Plugins/Toadies/Blur 'em and use these settings...TWICE
Go back to the duplicated top layer and go to Effects/Plugins/Eye Candy 4000/Corona and use these settings:
Add a new Raster layer above your background layer apply your brush in black (set your foreground color to black) Again you will use your Raster Deform tool (Pick tool) to move this brush around, duplicate it several times and fit the different parts of the brush around your design. If you like a certain part of the brush in a particular area, but other parts of the brush are sticking out somewhere you don't want to see...use you eraser brush or grab your Selection tool with a feather and remove what you don't want to see. Tweak your brushes however you like.
For your name once you type it, duplicate it, on the duplicate go to Effects/Plugins/Alien Skin Eye Candy 5/Impact/Chrome and use these settings:
Then go to Adjust/Hue & Saturation/Colorize and use these settings:
Add a drop shadow...

Then add a Corona...go to Effects/Plugins/Eye Candy 4000/Corona and use these settings:
Go back to the original name layer and apply the same Blast 'em and Blur 'em settings as you used previously. If this effect looks too large under your name, remember that awesome tool I've mentioned - the Raster Deform tool...resize it a bit it.
Add your copyright, taking care that it's legal and legible. The ceriph font works best at size 6 with your Antialias set to off...NOTE: for crisp edges on your fonts for your name, wordart, etc., set your Antialias to Sharp.
If you're going to resize, my advice is to go to each merged layer and resize it in a percentage to get it to about the size you need, then crop. Or again, you can use that good 'ol Raster Deform tool to drag the edges in to resize it.
Thank you for trying my tutorial, I hope you had fun with it and maybe learned something useful to hone your PSP skills. Please feel free to contact me if you have questions about any of my tutorials or if there are issues with broken links, etc.
Blessings,
Trese
No comments:
Post a Comment