
This tutorial was written by me on May 12th, 2012. Any resemblance to any other tutorial or tag is unintentional and is pure coincidence. Please do not claim my work as your own and do not post to any other website, blog or forum without permission from me. It is written with the assumption that you have a working knowledge of PSP and its components. I wrote it for PSP 9, but it should be compatible with most versions.
I recommend that you read through this or any tutorial you are attempting before starting it so you will know what to expect and how to get organized. This will be a somewhat challenging tutorial so please do read completely through it.
As with any of my tutorials when a plugin is required, change only the settings I recommend and leave the others on the default settings.
You will want to name your layers in this tutorial as the animation can become confusing if the layers aren't named.
What you will need to accomplish this tutorial is the stunning art of Ismael Rac. You can purchase his tubes HERE. Please support the arts and DO NOT use Rac's tubes without a license. You will also need this fun kit by Rebellious Scraps called At the Movie which you can purchase at Scraps and the City HERE. A light brush..I have supplied one HERE. Mask by me which you can download right from this blog...Trese Mask0081. Plugins Alien Skin Eye Candy 5/Impact, Eye Candy 4000 and Penta Jeans. Fonts are Adam Gorry Inline Lights HERE and Feel Script HERE which is a pay font but any elegant script font will do fine.
Ready? Let's get started...
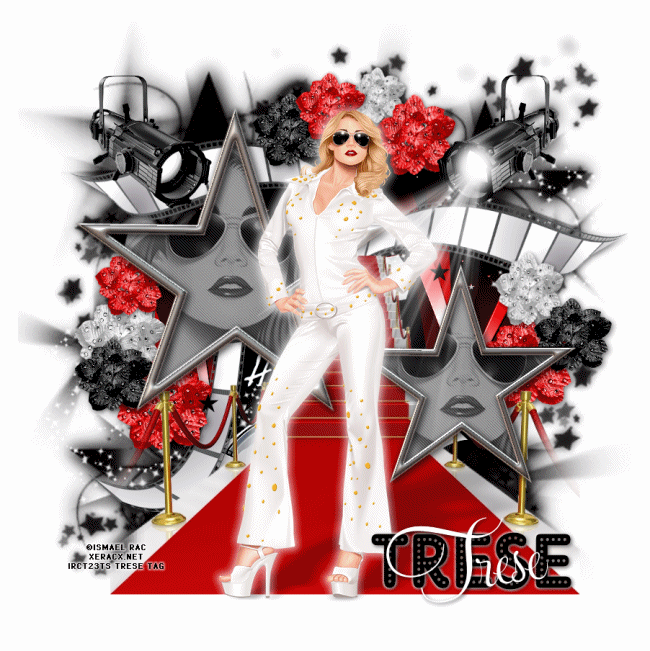
First open all of your elements and your tube into PSP. Also open the close up of the tube. I used flower 1, 2 and 3...negative 1 and negative 2...paper 1...sparkles 2...stage light...and staircase. Now start a 700 x 700 new white image. We will resize at the end.
Now, this tube comes with multiple layers including the color of her jumpsuit. Pick the color of the hair you wish to use, then select the white jumpsuit first. Copy and paste this tube into your working image. DO NOT move this tube any way...for animation purposes you need her right in the middle because we are going to paste each color of her jumpsuit right over each other and she can't be moved or the animation won't work. We will work the rest of the tag around her. Copy and paste this tube with the multiple jumpsuit colors right on top of one another as I just mentioned. Starting with the white, then the purple, the peach and lastly the blue.
Draw a large black circle in the middle behind your tube layers, convert it to a raster layer...copy and paste paper 1 over this layer. Using your Raster Deform tool resize the paper to fit into your circle. Then select the circle layer in your layer palette and use your magic wand to select the circle. In your layer palette select the paper layer and go up to Selection/Invert and hit delete to delete the areas of the paper outside the circle. Now in your layer palette set the Blend Mode to Hard Light.
Next, in your layer palette add a new Raster layer above your background layer and flood fill with black then resize by 90% and apply Trese Mask0081...merge group. You can always use your Raster deform tool to resize for precise sizing. Resizing with this tool will prevent distortion or pixelating of whatever you're resizing depending on how large or how small you go.
Next select your Symmetrical Shape Tool with the mode set on Star and in your Materials palette use the settings below:

Line style should be solid and width is 10. Draw two stars, one slightly larger than the other. Use my image as a reference for size and placement. On each star go to Effects/Plugins/Eye Candy 4000/Chrome and use the following settings:

Add a Raster layer beneath your stars and use your Freehand Selection tool without any feather and set on point to point...antialias should be checked and draw around the inside edges of your star then flood fill with black. Copy and paste the close up above each of these black flood filled stars. Again use your Raster Deform tool for precise sizing and resize to fit into the stars.
Next, on each of these tube layers go to Adjust/Hue and Saturation/Colorize and set the Saturation all the way down to Zero. Then go to Effects/Plugins/Penta/Jeans and use the following settings:

Add a slight drop shadow to each chrome star.
Now, using my image as a reference copy and paste the remaining elements into your working image. Remember any time for precise sizing and to prevent distortion or pixelation you can use the Raster Deform tool. This is my favorite tool and I use it with every single tag I create. Be sure to give each element a slight drop shadow.
Now, if you haven't named any of your layers, name each tube layer after the color of the jumpsuit. For instance, for the tube with the white jumpsuit, name that layer White and so on. The white tube should be the bottom tube layer since you pasted it first, the tube layer above this one should be named Purple since you pasted it above this white layer, then Peach and then Blue.
In your layer palette select the White tube layer and go up to Effects/Plugins/Alien Skin Eye Candy 5/Impact/Perspective Shadow and use the following settings:

With this plugin you can move the nodes around by holding down the CTRL key to get your shadow exactly where you want it. Apply this plugin to each colored tube layer.
Then go back to the White layer and go to Effects/Plugins/Eye Candy 4000/Corona and use the following settings:

Each Corona color should be the darkest part of the color of the jumpsuit except for the white one which should be white.
Now your Stage Lights should be pasted above your tube layers and one set to the right and one to the left. Once you place them, do not move them. Above your stage light layers add 8 layers and name them like the example below:

On the 1 lights white layer use the brush I supplied with the color set to white and apply it onto the light part of the stage light. Select an area on the light where you can line up the rays each time as I have done below:

Try to put the same part of the brush rays lined up to this area as close as possible or your lights will dance around and animation won't look right. Once lined up do not move this brush.
Now go to the 2 lights white layer and select your Selection tool. Set it to Ellipse with a 25% feather. Select around the white area of the light and flood fill once or twice enough to get a haze for the light:

Repeat this process for each color.
Now add your name and your copyright. For a neat and professional copyright I use pixel for copy fonts. You can google and find them all over the web. These fonts are best used at size 6 with your antialias set to off. This will prevent pixelating of the fonts. For your name be sure your antialias is set to sharp for crisp edges in your fonts.
Now we will animate....
Open Animation Shop and go back to PSP. In your layer palette make sure to hide the layers as in the layer palette example posted above. While holding down CTRL + SHIFT hit C to copy merged then go to Animation Shop and hold down CTRL and hit v to paste a new animation. Then go back to PSP. Select layer 1 lights white and mirror it (if your stage light is not right, move it this one time to line it up) and with your Move Tool move layer 2 lights white over the white part of the stage light on the right. Hold down CTRL + SHIFT and hit C to copy merged. Go to Animation Shop and this time hold down CTRL + SHIFT and hit L to paste after current frame.
Now go back to PSP. Hide 1 lights white and 2 lights white and unhide 1 lights purple and 2 lights purple. Hold down CTRL + SHIFT and hit C to copy merged...back over to Animation Shop and hold down CTRL + SHIFT and hit L to paste after current frame. Mirror your lights and your hazes and repeat as above...Repeat this process for the remaining colors.
You should have 8 frames in your animation. Now for the speed of the animation go up to Edit/Select All, Animation/Frame Properties. I set mine to 10...you can slow down the animation by increasing the number.
Resize to fit your needs and save as a .gif and you're done.
I hope you enjoyed my tutorial and maybe learned something from it to hone your PSP skills. Please don't hesitate to contact me with any question or concerns with broken links, etc. Happy creating...
Blessings, Trese
1 comment:
Thank you so much for this post. I want to let you know that I posted a link to your blog in CBH Digital Scrapbooking Freebies (please, notice the new url for my blog), under the Page 1 post on May. 13, 2012. Thanks again.
Post a Comment