Showing posts sorted by relevance for query mask. Sort by date Show all posts

Thursday, February 28, 2013

Thorn Among The Roses Animated PTU


If you enjoy the fragrance of a rose, you must accept the thorns which it bears.
Isaac Hayes


This tutorial was written by me on February 28th, 2013. Any resemblance to any other tutorial or tag is unintentional and is pure coincidencePlease do not claim my work as your own and do not post to any other website, blog or forum without permission from me. It is written with the assumption that you have a working knowledge of PSP and its components. It was written for PSP 9.

I recommend that you read through this or any tutorial you are attempting before starting it so you will know what to expect and how to get organized.

As with any of my tutorials when a plugin is required, change only the settings I recommend and leave the others on the default settings.

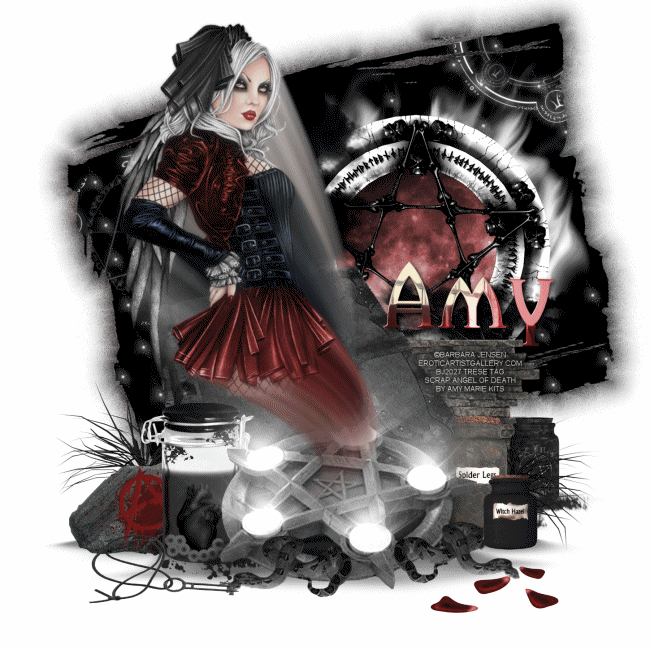
What you will need to accomplish this tutorial is the quirky and stunning art of Jasmine Becket-Griffith which you can purchase at Creative Design Outlet HERE and the amazing kit to go with by Rebel Designs HERE.  Please support the arts and do not use Jasmine's tubes without a license and certainly do not share her tubes or this kit. Mask is mine and can be found right here on this blog, it's Trese Mask 0243.  (Refer to the list on the left of this page)  Plugins are Alien Skin Eye Candy 5/Impact, Eye Candy 4000, Toadies and Xero. Animation is Simone's which you can find on Scrappy Bit of Fun HERE...it's animation 26.  Font is called Agatha and can be downloaded HERE.

Let's get started...

Begin by starting a new 700 x 700 white image which we will resize later.  Copy and paste fra3 into your new image...resize 60% and move slightly to the left, duplicate, resize 75% and move to the right of the original frame...duplicate once more, resize 50% and move to the top of your work....add slight drop shadows to each and your work should appear something like this...


Now use your Selection tool with a feather of 25% and set on circle....select the large circle frame and then copy and paste paper 5 beneath the frame.  Go to Selections/Invert and hit delete to get rid of the paper outside the frame.  Now duplicate this paper frame and move it above the large frame beneath the middle circlular frame and resize it 75%, duplicate again and move it above the middle circular frame and resize it 50% and place it beneath the small circular frame.

Now draw another circle with your Selection tool over the largest paper layer within the largest circular frame and copy and paste your tube and place her so that her face fits into the frame...go to Selections/Invert and hit delete to delete any of the tube outside the frame.  Selections/Select None.  Duplicate and mirror your tube layer, resize it 75% and move the layer above the middle frame paper layer and position her into the frame.  Duplicate once more, resize 50% and move her above the smallest circular frame paper layer and position her into the smallest frame.

Now on all of these tube layers go to Effects/Plugins/Xero/Radiance and use these settings....settings which I used on most of the elements in my image as well.  I just love the softness it affords and how it tends to deepen the colors. 


Now, using my image as a reference, copy and paste your tube and the remaining elements into your working canvas.  Don't forget drop shadows and for the tube and the elements you want to have a bit more dimension, use a Perspective Shadow.  Go to Effects/Plugins/Alien Skin Eye Candy 5/Impact/Perspective Shadow and use these settings:


This plugin may require a little practice.  There are just a couple of important things to remember when shadowing is to attempt to make your shadows appear natural and to watch closely all the areas of whatever you're shadowing.  You can view all the areas by moving the little red box around at the top of the window of this plugin...

(You can tweak your shadows by moving the nodes around in the preview window. To move one node at a time hold down your CTRL key. You can move the whole shadow by holding down your right mouse button and clicking in the middle of the shadow.  It's very important to think about how a shadow would be cast realistically and how dark or how light it should be. This plugin is one of my favorites and one I use with nearly every single one of my tags.)

Next, above your background layer copy and paste paper 5 and apply your mask.  Merge the group layers and then duplicate your mask and rotate the duplicate 45 degrees left or right, doesn't matter.  Then merge the two mask layers together and then grab your Selection Tool, set on circular with about a 70% feather.  Select the outer portions of the mask and then go to Selections/Invert and hit delete to soften the outer edges of the mask.

Now, in your layer palette, hide the background layer and the mask layer and Merge Visible, then copy this layer.  Go to Edit/Undo Merge Visible.  Unhide the mask layer and the background layer and above the mask layer paste the merged layers you just copied then go to Effects/Plugins/Toadies/Blast 'em and use these settings:


Now on this same layer go to Effects/Plugins/Toadies/Blur 'em and use these settings:


Now, let's merge a few layers together for ease in animating.  Merge down from the smallest circular frame to the background layer.  Hide these merged layers in your layer palette and then Merge Visible layers together.

Add your name and go to Effects/Plugins/Alien Skin Eye Candy 5/Impact/Bevel and use these settings:


Give it a slight drop shadow then go to Effects/Plugins/Eye Candy 4000/Corona and use these settings:


Now add your copyright, taking care that it is legal and legible. Your name should be the top layer and your copyright below it...merge the copyright down with the top merged layers.

Now let's animated and finish up.

Open Animation Shop (AS) by going to File/Jasc Software Products/Launch Animation Shop.  Back to PSP.  In your layer palette hide the top merged layers and your name then hold down CTRL + SHIFT and hit C to copy merged and go back to AS.  Hit CTRL + v to paste a new animation.  Open Simone's animation into psp and note the amount of frames the animation has.  Duplicate your newly pasted animation to have as many frames as Simone's.  I do this by right clicking on top of my ani and going down to Duplicate Selected.  Be sure you have all the frames selected in both your ani and Simone's ani and that the 'slider bar' on  both are all the way to the left putting you at frame 1 on both.  Resize Simone's ani to a width of 525 pixels to fit into our design here.  Now carefully drag the first frame of Simone's ani into the first frame of your ani.  The beginning of Simone's ani should begin at the bottom left corner of the face in the largest circle.  You may have to drag several times to get it right or you may get lucky.  If you're like me, most of the time I don't get lucky.  So I make me a few copies of the ani I'm dragging just in case.  If you don't get it right, simply Undo and redrag.

Now, go back to PSP.  Hide the bottom merged layers, unhide the top merged layers and your name.  Hold down CTRL + SHIFT and hit C to copy merged and then go back to AS and hit CTRL + v to paste new animation.  Duplicate as many times as needed to match the frames of your working animation which is 61.  Again, once duplicated be sure you have all the frames selected on your previous working ani and your newly working ani and that you are on frame 1 of both.  Carefully drag the new ani into the previously worked ani.  Check your work...View/Animation...if you're happy with it, resize and save as a .gif and you're done.

Thank you for trying my tutorial, I hope you had fun with it and maybe learned something to hone your PSP skills.  Please do not hesitate to contact me with any questions for concerns for any of my tutorials.

Blessings,

Trese

Thursday, August 2, 2012

Purple Impressions

This tutorial was written by me on August 2nd, 2012. Any resemblance to any other tutorial or tag is unintentional and is pure coincidence. Please do not claim my work as your own and do not post to any other website, blog or forum without permission from me. It is written with the assumption that you have a working knowledge of PSP and its components. It was written for PSP 9.

I recommend that you read through this or any tutorial you are attempting before starting it so you will know what to expect and how to get organized.  

As with any of my tutorials when a plugin is required, change only the settings I recommend and leave the others on the default settings.

What you will need to accomplish this tutorial is this beautiful kit by Ladyhawwk Designs called Hot Summer Love which can be purchased at Creative Design Outlet HERE.  You will also need the stunning art of Jamie Kidd which can also be purchased at Creative Design Outlet HERE along with all of his other tubes.  Please support the arts and DO NOT use his tubes without a license to do so.  Mask...04PSPMask HERE...if this mask is your creation please let me know so I can give you credit, I got it somewhere in one of my groups.  Xero Plugin and font is Miss Lankfort which you can download HERE.

Let's do this...

First open your tube and elements into PSP.  You can use my image as a reference for which elements I used.  I did do some colorizing but you should be able to recognize the elements.

Copy and paste paper of choice into a new 700 x 700 white image.  I used paper 3.  Resize 65% and Now go up to Adjust/Hue and Saturation/Colorize and use these settings:


(Use these same settings for each purple colorization)

Apply your mask supplied and merge the group.

Copy and paste element 28 above your mask, resize it 90%, duplicate it then flip and mirror it.  Place it to the right side of the frame of your mask.  Use the same Colorization settings as above and then give it a slight drop shadow, I used the following shadow:


(I used the same drop shadow for all of my elements.)

Next, copy and paste your tube above this element, resize it 80% and place most of it to fit nicely inside the frame of your mask, then using your Selection Tool with a 75% feather, select the very bottom of your tube and then hit delete.  Go to Effects/Plugins/Xero/Radiance and use these settings:


Then go back to Effects/Plugins/\Xero/Porcelain and use these settings:


Now copy and paste the same element 28 above your tube, resize it 90%, colorize it and place it to the bottom right of the frame of your mask....add the drop shadow.

Now copy and paste the rose, element 7 into your working image, resize 60% then go to Adjust/Hue and Saturation/Colorize and this time set the Saturation to zero.  Duplicate your rose and on the duplicated rose use the same Colorization settings as we first used.  Now using your Selection Tool with a 75% feather, select the stem and leaves and hit delete and then merge the two roses together.  Duplicate it twice and arrange the flowers as I have done.

Next, copy and paste the rest of your elements into your working image.  You can use my image again for reference for size and placement.  Also for some of the elements I used the gray colorizing and some the purple.  You can always use your Raster Deform tool for precise sizing.  It also prevents distortion of what you're resizing.  Give each the same drop shadow as above.

Now, above your mask layer copy and paste element 18, colorize it with the purple and set the blend mode to soft light.  Use your selection tool with a 75% feather and delete the parts of the element that is not inside the frame of your mask.

Add your name and copyright taking care that your copyright is legal and legible.  I use pixel or copy fonts for a professional-looking copyright.  You can google and find all kinds of these fonts.  They work best, most of them, at size 6 with your antialias set to off.  Also for crisp edges on your fonts for your name or wordart, set your antialias to sharp.  Resize to fit your needs and you're done.

I'm glad you tried my tutorial and I hope you gleaned something from it to hone your PSP skills.  Please feel free to contact me with any questions or concerns over broken links, etc.  You can find me on facebook or at tresetags@gmail.com.  Happy creating...

Blessings, 

Trese

Monday, September 3, 2012

Conjuring Fear PTU

There are times when fear is good.  It must keep its watchful place at the heart's controls.
Aeschylus

Conjuring Fear

This tutorial was written by me on September 3rd, 2012. Any resemblance to any other tutorial or tag is unintentional and is pure coincidence. Please do not claim my work as your own and do not post to any other website, blog or forum without permission from me. It is written with the assumption that you have a working knowledge of PSP and its components. It was written for PSP 9.

I recommend that you read through this or any tutorial you are attempting before starting it so you will know what to expect and how to get organized.

As with any of my tutorials when a plugin is required, change only the settings I recommend and leave the others on the default settings.

What you will need to accomplish this tutorial is the enchanting art of Barbara Jensen.  You can purchase her tubes on her site HERE.  This phenomenal kit by Amy Marie Kits called Angel of Death which you can purchase from her blog HERE.  Thanks Amy for your talents and for the use of this magical kit, I loved it.  Please support the arts and DO NOT use Barb's tubes without a license and DO NOTshare Barb's tubes or this kit.  Supplies I have included HERE which are several brushes and the mask.  Plugins are Alien Skin Eye Candy 5/Impact, Xero, Toadies and Eye Candy 4000.  Font is called Platinum and can be found HERE.

Ready to get started?  Let's do this....

First we need to get your brushes into PSP for use.  It's just a coupe easy steps.  Open the files I provided into PSP.  They're in .png format, you can also use .jpegs.  For each brush go to File/Export/Custom Brush.  Name your brushes and click Ok and they're installed in PSP ready for use.

Start a 700 x 700 new white image.  You can resize later.  Copy and paste element 6 and resize it 50%.  Place the pentagram to the bottom of your canvas.  Go to Effects/Plugins/Alien Skin Eye Candy 5/Impact/Perspective Shadow and use these settings:


Since the example has the book I'll mention here that we are going to put a Perspective Shadow on most of the elements in this image.  What you will set in the Settings Tab is Short Perspective Shadow in the Front.

This plugin may require a little practice.  There are just a couple of important things to remember when shadowing is to attempt to make your shadows appear natural and to watch closely all the areas of whatever you're shadowing.  You can view all the areas by moving the little red box around at the top of the window of this plugin...


(You can tweak your shadows by moving the nodes around in the preview window. To move one node at a time hold down your CTRL key. You can move the whole shadow by holding down your right mouse button and clicking in the middle of the shadow.  It's very important to think about how a shadow would be cast realistically and how dark or how light it should be. This plugin is one of my favorites and one I use with nearly every single one of my tags.)

There is another favorite tool of mine, it's called the Raster Deform Tool, in the newer versions I believe this tool is called the Pick Tool.  I use this tool every single day.  It's perfect for precise sizing and it prevents the distortion/pixelization that takes place resizing in percentage depending how large or how small you go.

So, since I brought up that tool, begin copying and pasting your other elements into your canvas.  You can use my image as a reference for size and placement.

Once you have each element in place go to Effects/Plugins/Xero/Radiance and use these settings:


And don't forget your Perspective Shadows.

To colorize the moon behind the top right pentagram go to Adjust/Hue and Saturation/Colorize and use these settings:


At this point copy and paste your tube into your Canvas on the top.  Resize and place her into position...use that Raster/Deform or Pick tool, you'll fall in love with it as it will make life easier for you.

Once you have her into position, grab your selection tool with a slight feather, 50% or so and select the very tip of your tube where it's cut off sharply at the legs and hit delete to smooth that out.  Now go to Effects/Plugins/Alien Skin Eye Candy 5/Impact/Motion Trail and use these settings:


In the Settings Tab select Right at You, cool hunh?  What we're attempting to do here is make it appear that a spirit of fear is being conjured up from the pentagram.  You can play with your trail here...see if you can accomplish this conjure up better than I.

Now we're going to get our mask in and start playing with some brushes.  Above your background layer add a new Raster layer and apply your mask or you can simply copy and paste the file I provided to the bottom of your canvas.  Personally I'd put it in my masks for use later.  Once you have it there, you can always use your Raster/Deform-Pick Tool for precise sizing.   You will need it anyway to rotate this mask slightly to the left.

Once your mask is in place go up to Selections/Select All/Selections/Float/Selections/Defloat and start painting your stars and other brushes into the mask.  By selecting it, the marching ants prevent the brushes from going outside the edge of the mask.  I would add new layers for each brush...this way you can again use your Raster Deform tool to resize them if you want.  Play around with the aurora brushes behind the top Pentagram...I think it gives it a cool glow, don't you?

Once you have all the brushes in your design where you want them go back to Selections/Select None.  Duplicate your mask and on the bottom mask go to Effects/Plugins/Toadies/Blast 'em and use these settings:


Then go immediately back to Effects/Plugins/Toadies/Blur 'em and use these settings:


Now go back to the top mask in your layer palette and go to Effects/Plugins/Eye Candy 4000/Corona and use these settings:


Now let's do your name...Once you have it typed and sized and where you want it, go to Effects/Plugins/Alien Skin Eye Candy 5/Impact/Chrome and use these settings:


Now duplicate your name and on the duplicate go back to Adjust/Hue and Saturation/Colorize and use the same settings you just used.  Merge the two name layers together and add a good dark drop shadow to make it stand out.

Add your copyright taking care that it's legal and legible.  For a neat and professional-looking copyright I use pixel, copy or ceriph fonts.  You can google and find hundreds of these fonts.  Most work best at size 6 with your antialias set to off.  Note that for crisp edges in your normal fonts, set your Antialias to Sharp.  I made my copyright fit in my design and stand out by making it a color close to the background I put it on and added a dark Corona.

Resize your work, save it as a .jpeg or .png and you're done.

Thank you for trying my tutorial.  I hope you had fun with it and maybe learned something to hone you skills.  Please feel free to contact me with any questions you have about any of my tutorials and please by all means let me know of issues like broken links, etc.  I'd love to see your results and hear your feedback.

Blessings,

Trese


Tuesday, December 22, 2009

New Tutorial: On Lover's Lips

This tutorial was written by me on December 22, 2009. Any resemblance to any other tutorial is strictly coincidental. Please do not post this tutorial to any other site without my permission and certainly do not claim this tutorial as your own. It is written with the assumption that you have a working knowledge of PSP and its tools.

Things you will need to do this tutorial include PSP, a mask of your choice, I used an Essex Girl mask, sg_quilt and lattice that you can find HERE on her site along with tons of her gorgeous masks. I've included the mask in the supplies. You will need this beautiful kit by Foxy's Designs, Delicate Ways. You can find this kit at her stores HERE or HERE, she has a lot of amazing kits. I recommend her work highly. You will also need a romantic type image. I included the one I used in the supplies. I simply done a Google search for "Romantic Images." If this image belongs to you and you want credit here, just leave me a message in my chat box. You will need Alien Skin Eye Candy 5.0/Impact. You can find the trial version HERE. A tube of choice, I used the beautiful art of Zindy Nielsen, you can find her tubes on her site HERE. Do not use her tubes without a license. I used a one of her free to use tubes called Temporary Peace. Brushes of choice. And you will need a font of choice, I used TheNautiGirl which is a ROB font.

SUPPLIES

Okay, let's get started. First be sure to place your mask into your PSP mask folder. I will be placing my tutorials to a new site once I get set up, but still have my old tuts on Funhouse. I will have some tuts on how to do things in PSP such as how to put masks into PSP...lol. Once you have done this, open your kit into the PSP browser and decide which elements you wish to use. For the elements I used, you can look at my tag for reference. You will need to resize according to how large you want your tag. I use my raster deform tool for precise sizing.

Now you will open a new white image in PSP as large as you wish to make your tag, I usually start large so I can see everything good and resize later. Copy and paste paper of choice from the kit as a new layer and resize it so it fills about 85% of the canvas, apply mask. Copy and paste the Romantic Image on top of the mask. Use your eraser tool to erase any parts of the image that sticks out from the frame.

Next you will go to Adjust/Hue and Saturation/Colorize and adjust the coloring of the Romantic Image to match the colors of your paper, but use a lighter hue. Then go to your Layers Palette and set the Blend Mode on Soft Light. Copy and paste your tube on top of the Romantic Image and reduce the opacity to 34% and set the Blend Mode to Luminance.

Now you will copy and paste the elements you wish to use from the kit and place them around to your liking or use my image for reference. You will use a light drop shadow on each. Here are my settings: Offset Vertical = 1, Horizontal = 1, Opacity = 47%, Blur = 8 and the Color is black. For the elements you wish to use a Perspective Shadow on, go to Effects/Plugins/AlienSkin Eye Candy 5/Impact/Perspective Shadow and use these settings: In the Settings tab - Long Perspective Shadow in Back. In the Basics tab you will check Perspective Shadow, Center Offset direction = 192, Center Offset Distance = 9.13, Overall Opacity = 32, Overall Blur = 14.48, Perspective Blur = 16.49, Fade Out = 14, check Mask Selection and the color will be Black.

Now add brushes of choice and your words and name and we are done. I hope you enjoyed my tutorial and hopefully learned something. Feel free to contact me for any questions you have.

Merry Christmas and Happy New Year


Trese


Saturday, August 11, 2012

Timeless - PTU Animated

Timeless

This tutorial was written by me on August 8th, 2012. Any resemblance to any other tutorial or tag is unintentional and is pure coincidence. Please do not claim my work as your own and do not post to any other website, blog or forum without permission from me. It is written with the assumption that you have a working knowledge of PSP and its components. It was written for PSP 9.


I recommend that you read through this or any tutorial you are attempting before starting it so you will know what to expect and how to get organized.


As with any of my tutorials when a plugin is required, change only the settings I recommend and leave the others on the default settings.

What you will need to accomplish this tutorial is this absolutely stunning kit by the uber talented Crazy Carita called Timeless Elegance.  You can purchase this kit on Barbara Jensen's site HERE...you can also purchase this tube on Barbara's site HERE.  Please support the arts and DO NOT use Barb's tubes without a license. Mask is a Shimmer's mask that you can download HERE. I could not find a website for theswe masks.  If this is your mask please contact me so I can give you credit here.  Brush I supplied HERE.  Plugins are Xero and Alien Skin Eye Candy 5/Impact and Nature.  Font is CaslonNo540SwaD...you can find it HERE.

Let's do this...

First off I'm going to tell those of you who do not know how to install a .png or a jpeg image into your PSP brush folder which converts it to a brush to use in PSP.  Open the .png image I supplied as your brush into PSP then go to File/Export/Custom Brush.  Name your brush and click OK.  That's it, now you can use it as a brush.  Anything you put into your brushes this way cannot be any larger than 500 x 500 pixels.

Now start a 700 x 700 new white image, we'll resize in the end.  Copy and paste el5, the frame element into your new image and resize it 80%.  Copy and paste paper1 beneath this frame element and resize it 70% then use your Raster Deform tool (or your Pick tool) and drag the four corners to fit the paper inside the frame.

Next copy and paste the same paper above your background layer, resize it 80% and apply your mask.  (shimmers mask 10) Then duplicate the frame twice and place them over the two rectangle shapes in your mask.  Use your eraser tool to erase any of the mask outside the frames. And give each one a drop shadow using the following settings:


Your work should appear like this so far:

Copy and paste your tube on the top of your canvas...resize it 110% and duplicate it.  Drag the original tube beneath the first frame you pasted and then go back to the tube on top of the layer palette.  Erase parts of the tube outside the frame and do the same for the original tube.

In your layer palette go back to the tube on top of your canvas and then go to Adjust/
Automatic Saturation Enhancement and use these settings:


Then go to Effects/Plugins/Xero/Radiance and use these settings:


Next go to Effects/Plugins/Alien Skin Eye Candy 5/Impact and use these settings:


 (You can tweak your shadows by moving the nodes around in the preview window. To move one node at a time hold down your CTRL key. It's very important to think about how a shadow would be cast realistically and how dark or how light it should be. This plugin is one of my favorites and one I use with nearly every single one of my tags.)

Next, above your mask layer copy and paste el8 and then go to Adjust/Hue and Saturation/Colorize and use these settings:


Then duplicate and flip it...duplicate it and rotate it 90 degrees by going to Image/Rotate/Free Rotate then duplicate and mirror it.  Fit the four elements together to form a diamond shape...it should look like this:


Once you have it arranged merge these four layers together and give it the same drop shadow you used above.

Using my image as a reference for size and placement, copy and paste the rest of the elements into your working canvas.  For precise sizing you can always use your Raster Deform or Pick tool and your natural elements don't have to be placed exactly where I placed mine.  An important thing to remember about natural elements is that nothing in nature grows symmetrically.  Don't forget your drop shadows.

For the Candelobra you want it to have some depth so use the perspective shadow by going to Effects/Plugins/Alien Skin Eye Candy 5/Impact and use these setting:


And remember you can tweak your shadow by moving the nodes around, for moving one node at a time hold down your CTRL key.

The same for the humming bird, it should cast a shadow below it, your settings should be something like this:


Add your name with the CaslonNo540SwaD font and then go to Effects/Plugins/Eye Candy 5/Impact/Chrome and use these settings:


Duplicate your name and now go to Adjust/Hue and Saturation/Colorize and use these settings:


Grab your Selection tool with a 75% feather and select the lower parts of the letters of your name like the example below:


And hit delete a few times to get the gradient effect.  Add the same drop shadow.

Now add your copyright making sure it's legal and legible and we will get ready for animation...

Duplicate the candles four times for a total of five layers.  Hide the duplicates and make sure you're on the original layer in your palette.  About midway of the flame on the candles use your selection tool with a 2% feather to draw tiny areas for the flames like the example below:  (BE SURE YOU DO NOT MOVE THESE LAYERS AT ALL)


Now while still on the original candelobra layer go to Effect/Plugins/Alien Skin Eye Candy 5/Nature/Fire and use these settings:


In the settings tab select Small Candle.  Apply the plugin and then hide the original layer, unhide and select the layer above it and go back to Effects/Plugins/Alien Skin Eye Candy 5/Nature/Fire and use the same settings you just used and hit the Random Seed button once.  Repeat this process for the remaining candle layers. On the last layer you just added flames to go to Effects/Plugins/Eye Candy 4000/Corona and use these settings on every candelobra layers selections:


Once done hide the last layer you just finished and unhide the original candles layer.

Let's animate...

Open Animation Shop..go to File/Jasc Software Products/Launch Animation Shop and go back to PSP.  Hold down CTRL + ALT + C to copy merged and then go back to Animation Shop and hit CTRL + v to paste a new animation...back to PSP.  Hide the original candles layer and unhide the duplicated layer right above it....hold down CTRL + ALT + C to copy merged...back to Animation Shop and this time hold down CTRL + ALT + L to paste this frame after the frame you pasted previously...go back to PSP and repeat this process for the remaining candles layers.  Your animation should have five frames.  You can check it by going to View/Animation...if you're satisfied with your animation resize it and save it as a .gif and you're done.

I'm pleased you tried my tutorial.  I hope you had fun with it and gleaned something to hone your PSP skills. Please feel free to contact me with any questions you have about any of my tutorials or with any issues with broken links, etc.

Blessing,

Trese


Gothic Rose PTU


Gothic Rose


This tutorial was written by me on August 11th, 2012. Any resemblance to any other tutorial or tag is unintentional and is pure coincidence. Please do not claim my work as your own and do not post to any other website, blog or forum without permission from me. It is written with the assumption that you have a working knowledge of PSP and its components. It was written for PSP 9.


I recommend that you read through this or any tutorial you are attempting before starting it so you will know what to expect and how to get organized.


As with any of my tutorials when a plugin is required, change only the settings I recommend and leave the others on the default settings.

What you will need to accomplish this tutorial is the beautiful art of Anna Marine.   You can purchase her tubes at Creative Design Outlet HERE.  Please support the arts and do not use Anna's tubes without a license.  This wicked scrap by Foxy's Designz called Gothic Rose that you can purchase at her store, Digi Fox's Studio,  HERE.  Brush provided by me HERE.  Mask by Essex Girl sg_valentine 2 which you can download from her site HERE along with all of her other amazing masks.  Plugins are Alien Skin Eye Candy 5/Impact and Eye Candy 4000.  Font is Evanescent that can be downloaded HERE.

Let's get started...

First start a 700 x 700 new white image and copy and paste frame 5 into it.  Resize it 80% and then copy and paste frame4 and resize it 60%.  Give both frames drop shadows with the settings below:


Copy and paste paper 10 below both of your frames, resize 50% and with your eraser tool erase the areas of the paper outside the frames.

Now copy and paste Gem 2 to the top of your canvas, resize 25% and give it the same drop shadow.  Place the gem in the dark areas between the frames...see below and then duplicate it enough times to complete the circle:


Copy and paste frame 2 above your paper layer and resize it 55%...give it the same drop shadow.

Copy and paste Rose 5 on top of you canvas, resize it 50%, duplicate, mirror and flip it.  Place the original to the top left of your work and the duplicate to the bottom left of your work.  Give both of these elements the same drop shadow.

At this point copy and paste your tube between your paper and frame 2, resize it 75%.  Duplicate and drag the duplicate above the duplicate of Rose 5 on the bottom left of your work.  Erase any of the tube to the bottom right outside the frame 2 on both tubes layers.  Then on your duplicated tube layer go to Effects/Plugins/Alien Skin Eye Candy 5/Impact/Perspective Shadow and use these settings:


NOTE

 (You can tweak your shadows by moving the nodes around in the preview window. To move one node at a time hold down your CTRL key. It's very important to think about how a shadow would be cast realistically and how dark or how light it should be. This plugin is one of my favorites and one I use with nearly every single one of my tags.)

Now go to Adjust/Automatic Saturation Enhancement and use these settings:


Now, above your background layer add a new raster layer and flood fill with black and apply your mask...sg_valentine2 and resize it 80%.  Above your mask copy and paste the Garnet element.  Place it to the top edge of your mask, resize it 45% and erase the two gems on each side, then duplicate and flip it, then mirror it.  Duplicate it again and rotate it 90% and place it to the right flat edge of your mask, duplicate mirror and flip it. Then duplicate it again and rotate it 45 degrees to the right and place it on the flat edge to the right of your mask.  Erase any of the gems that interrupts the circle around the mask.  Repeat this process until the edges of the mask are covered. Give each of these elements the same drop shadow.

Now copy and paste the leaf element above the frame with the red roses, resize it 50% and place it in the four corners of your work.  You'll need to duplicate, flip and mirror it each time.  Give each of these elements the same drop shadow you've been using.

Now copy and paste Jewel 1 below your top tube layer, resize it 60% and place it under her hands...see my image as a reference.  Copy and paste the candle above your top tube layer, resize it 40% and give it the same perspective shadow as you used above...remember to see my notes on how to tweak this shadow.  Next copy and paste the skull with the rose in its mouth, resize it 60% and place it below the candle and then copy and paste the crow, resize it and place it on the skull.  Sometimes I like to use my Raster Deform tool for precise sizing, it also cuts down on the distortion that happens when resizing in percentages.  Use my image as a reference for size and placement.

At this point, hide your background layer and merge all visible layers.  Resize it 75% and go to Effects/Plugins/Xero/Radiance and use these settings:

Now copy and paste Steel 1 beneath your merged work, Resize it 70% and place it to the top of your work (see my image for reference)...duplicate and flip it...duplicate...rotate 90 degrees and place it to the right of your work...duplicate and mirror one more time.  Give each of these elements the same drop shadow you've been using.  Unhide background layer.

On your merged work layer go to Effects/Plugins/Eye Candy 4000/Corona and use these settings:


Now hide your background layer and merge Visible.  Above your background layer add a new Raster Layer and name it Brushes.  Set your brush color to black and paint multiple black brushes around your work and then change your brush color to red and randomly paint a few red brushes over the black ones.  Once painted to to Effects/Texture Effects/Mosaic Glass and use these settings:


If your brushes are too large, you can always, always, always use your Raster Deform tool (or Pick tool) for precise sizing.

Now once again hide your background layer and merge Visible.

Set your antialias to Sharp and add your name.  (This gives you crisp edges on your fonts)  Go to Effects/Plugins/Eye Candy 4000/Corona and use these settings:


Give your name the same drop shadow.

Resize and add your copyright making sure it's legal and legible.  For a professional-looking copyright I use Pixel or copy fonts.  You can Google and find hundreds of these fonts. Most of them work best at size 6 with your antialias set to OFF.

Thank you for doing my tutorial.  I hope you had fun and maybe gleaned something from it to hone your PSP skills.  Feel free to contact me with any questions you have about any of my tutorial or any issues with broken links, etc.

Blessings,

Trese