Wednesday, October 27, 2010

Stalker Tags


Have several to post, but having internet issues...storms and I have satellite internet...more coming. If you haven't already, you should come and join us at the Stalker Forum. Learn facts about Ismael Rac, be the first to know about new tubes coming out, meet other stalkers and show off your work. Join us HERE.

Tuesday, October 26, 2010

My First Templates


Trese Template 002 HERE


Trese Template 001 HERE

These are my first attempts at templates, grab them if you can use them. I would love to see what you do with them. Please email me your tags at tresetags@gmail.com . Please leave me a comment and let me know if you like these templates and I'll make more.

Sunday, October 24, 2010

Saturday, October 23, 2010

New Tag - Let The Music Move You


Practicing with animation, I like how this turned out. What do you think?

New Tag Le Freak


Okay, let me clear this up right now, I AM NOT into anything kinky...lol. This was a challenge from Another Creative Design..."Life is but a Song" challenge where you're given a song title or lyrics from a song. Le Freak was in the list, I was looking for a tube and came across these and just went with it...lol. I guess I am a little le freak...hmmm, I'm glad my mom doesn't visit my blog. You should really come and visit our forum, see what fun you're missing out on?

Friday, October 22, 2010

ACD Template Challenge


If you haven't already, you need to come and join the fun in the forum at Another Creative Design...lots of fun challenges to hone your skills folks. Be sure to say I sent ya...;-l

ACD Blend Challenge

New PTU Tutorial...The Witching Hour


The Witching Hour


The Witching Hour is the time when supernatural creatures such as witches, demons and ghosts are thought to be at their most powerful, and black magic at its most effective. The hour is typically midnight. The William Shakespeare quote in this tag is referring to this time of night. The hour before midnight, 11pm, is used for the practice of witchcraft. I DO NOT support witchcraft or any of the black arts. I just enjoy halloween and do a lot of research on the subject. For more information on the subject, you can google it...this is what I do.

This tutorial was written by me on October 22nd, 2010. Any resemblance to any other tutorial is pure coincidence. Please DO NOT claim this tutorial as your own or post it to any other blog or website without permission from me. It was written for PSP 9, but should be compatible with any version of PSP. I wrote it assuming that you have a working knowledge of PSP and it's components.

What you will need to accomplish this tutorial: This beautiful scrapkit by Foxy's Designz called Midnight Dreams that you can purchase HERE at her store Digi Fox's Studio. Thank you Foxy for the use of this kit. Template by 
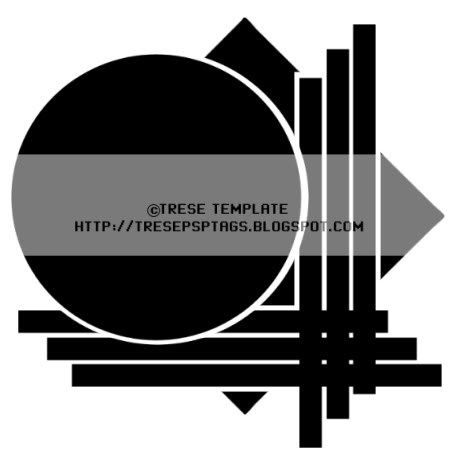
Creative Misfits Creations, Aqua-Abstract #3, that you can find HERE. Thank you ladies for your talents and y our generosity. Several plugins: Xero, Eye Candy 5-Impact, Eye Candy 4000 (optional) and dsb flux. Tube of choice, I used the amazing artwork of Ismael Rac that can be purchased at his store HERE. Please do not use his tubes without a license. You will need some star brushes. Font of choice, I used Albemerle Swash which can be downloaded HERE. For the quote I used a pixel font. Any pixel font will do. You can find some HERE.

Let's get started.

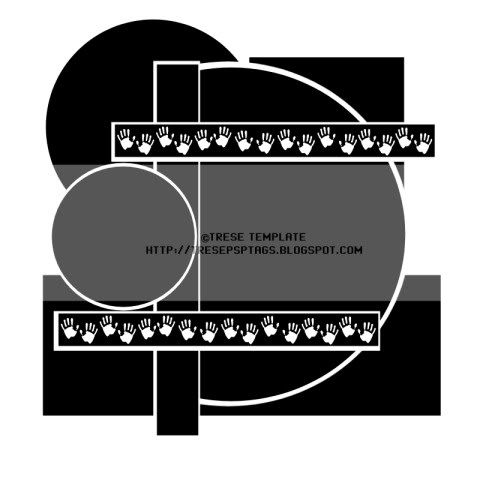
With PSP open, open your template, tube (open the close-up tube as well) and the elements you will use from the scrapkit. You can use my image as a reference for the elements I used. Duplicate your template (Ctrl + D) and close the original. Delete the credits and the wordart layers. Increase canvas size to 700 by 700. (Image/Canvas size) Be sure the middle arrow is selected. Flood fill the bg (Raster 1) layer with white.

Select the black half circle layer in your layer palette, then get your magic wand and click on the black half circle to select it. Copy and paste the close-up tube as a new layer and position her face into the circle. Go to Selections/Invert and then hit delete on your keyboard. Now go up to Effects/Plugins/Xero/Radiance and use these settings:
Strangeness 112
Charm 137
Truth 128
Beauty 255
Decrease this tube layer by 50%.

What I done to get the quote on the rectangle straight is copy this layer and paste it as a new image. I then used my Raster Deform tool to straighten the rectangle vertically. Then I used my pixel font and typed my quote being sure to align it into the rectangle. Then convert the text to a raster layer. I then copied and pasted the text into my working image and used my raster deform tool to position it into the rectangle in my image.

Now you should paste your elements from your kit into your working image. Give them a slight drop shadow once positioned and sized. I normally use my Raster deform tool for resizing so I can get the exact size I want. Once you have all elements in place, merge the three star layers together and then duplicate this layer twice for a total of three layers. With the bottom or top star layer selected (where you start is your choice), go to Effects/Plugins/dsb flux/Bright Noise and use these settings:
Intensity 40
Direction-check Mix
(on the remaining two layers, simply increase the intensity by 10 for each layer)

NOTE: To make the lantern appear to be hanging off of the left rectangle, duplicate this tube layer and place one underneath the left rectangle layer. On the lantern on the top use your eraser tool to erase parts of the handle to make it appear to be hanging.

Copy and paste your tube into your working image. Go to Effects/Plugins/Eye Candy 5.0/Perspective Shadow and use these settings:
Settings tab:
Leave default settings
Basic tab:
Check Perspective Shadow
Center offset direction 309
Center offset distance 10.40
Overall opacity 37
Overall Blur 9.41
Perspective Blur 12.10
Fade out 23
Shadow color is black
Check Mask Selection

In your layer palette add a Raster layer above the bg layer (Raster 1). You can apply your star brushes on this layer.

Add your name. For the optional use of Eye Candy 4000 you can add the black halo around your name. Go to Effects/Plugins/Eye Candy 4000/Gradient Glow and use these settings:
Basic tab:
Glow Width 3.0
Soft Corners 25
Overall Opacity 100
Check Draw outside selection
Color Tab:
Black Halo
Opacity 100
Add a slight drop shadow to your name.

Add your copyright information and we are done. I hope you enjoyed my tutorial and hopefully learned something from it. I welcome any questions for feedback. You can find me on Facebook, just click on my Facebook badge...or you can email me at tresetags@gmail.com

Thank you.

Thursday, October 21, 2010

New Tutorial: Faith, Hope & Courage PTU


This tutorial was written by me on October 21st, 2010. Any resemblance to any other tutorial is pure coincidence. Please do not claim this tutorial as your own or post to any other blog or website without permission from me. It was written for PSP 9, but should be compatible for any version. And it was written with the assumption that you have a working knowledge of PSP and it's components.

What you will need to accomplish this tutorial: This beautiful scrapkit by the amazingly talented Artmama called Pink Ink that you can purchase HERE at Exquisite Scraps. Thank you Artmama for this wonderful kit. Also from Artmama, you will need her template #20, which you can find on her blog HERE. Once again, thank you Artmama for your generosity. Mask by Essexgirl, Stencilled Circle 1, which you can find HERE along with all of her other masks. You will need to put this mask into your PSP mask folder. The Xero plugin found HERE. This plugin will need to be installed into your plugin folder in PSP. Tube of choice, I used the fantastic art of Ismael Rac. This tube is one of a number of free tubes that can be found on his site HERE. You must still have a license to use this tube which can be requested from his site. Please DO NOT use his tubes without a license. Fonts of choice, I used some of my favorite fonts. One I used for wordart is free called Kingsthings Keltika which you can find HERE. The other is Ekaterina Velikaya which can be downloaded HERE.

Without further ado, let's get started.

Once you have opened PSP, open Artmama's template #20, duplicate (Shift + D) and then close the original. Resize your canvas to 700 by 700 (Image/Canvas Size) Be sure the middle Placement arrow is checked and you are resizing the pixel dimensions. Delete the layers with her copyright and the word art. (NOTE: if you are not using the song lyrics, you can delete the copyright for those.)

You will now open the elements and papers you wish to use in the scrapkit as well as your tube. You will need the standing tube and the large tube. (They come together in the download) You can use my image as a reference for the elements and papers I used.

In your layer palette, select the Circle Glitter Layer and then go to Adjust/Hue & Saturation/Colorize and use these settings: Hue 255 and Saturation 191.

Next in your layer palette, select the Circle bg layer and add a slight drop shadow, about 40% with 1 offset Vertical and Horizontal. You will also do a negative (-1) offset Vertical and Horizontal.

Again in your layer palette select the circle layer. Go to Selections/Select All/Selections/Float/Selections/Defloat. Copy and paste paper of choice INTO the selection. Deselect. (Ctrl + d).

Back to layer palette and select the rectangular glitter layer. Go to Adjust/Hue & Saturation/Colorize and use these settings: Hue 255 Saturation 73.

In your layer palette select rectangular back layer and go to Selections/Select All/Selections/Float/Selections/Defloat. Copy and Paste paper of choice INTO selection. (If your paper choice does not look good pasting into selection, simply paste your paper as a layer and then go back to Selections/Invert and hit delete on your keyboard.)

On each right and left square glitter layers go to Adjust/Hue & Saturation and use these settings: Hue 255 Saturation 191.
On the right square frame layer go to Selections/Select All/Selections/Float/Selections/Defloat. Copy and paste the large tube as a new layer and move it so that the breasts are centered in the selection. Deselect and then duplicate and mirror this layer. You will have to drag this layer above the left square frame in your layer palette. For each of these two new layers go to Effects/Plugins/Xero/Radiance and use these settings: Strangeness 155, Charm 67, Truth 128, and Beauty 222.

Almost done...at this time, go back to layer palette and select the bg layer. Add a new Raster layer and flood fill with black. Now to add the mask...go to Layers/Load/Save mask and apply the sg_stencilled circle 1 mask. Merge group layers.

Add your wordart and name and then copy and paste the tube. Go to Effects/Plugins/Xero and apply the same settings as before.

Add your copyright information, resize to fit your needs and we're done. I hope you enjoyed my tutorial and hopefully learned something from it. I enjoy seeing your results, please contact me at tresetags@gmail and send me your results as well as any questions or concerns.

Thank You.


Wednesday, October 20, 2010

ACD Tutorial Challenge


Just finished this tutorial as a challenge from Another Creative Design.
You can find this tutorial HERE, it's called Witchy Poo by Tori's Tidbits.


Some New Tags


Some of my new tags I thought I'd share.

Tuesday, October 19, 2010

Another Creative Design Forum


Just joined this wonderful forum and I'm having a blast. There is some very friendly folks there and some amazing talent. We have some weekly challenges to help hone your skills that I know you will enjoy...some come and get in on the fun, would love to see you there...tell them Trese sent you.

Back to the Land of the Living

So many things has happened that has kept me away, it's not even worth discussing. Anyway, I'm back and ready to resume creating and sharing. Please let me know if you find any dead links to any of my tutorials so I can fix them. I will be writing again and will house my new tutorials on a new site, however, my old tuts will remain where they are for the time being at Funhouse Tutorials. I have missed all of my friends and I'm happy to be home again. Sonya let's Rock!